 Free plan
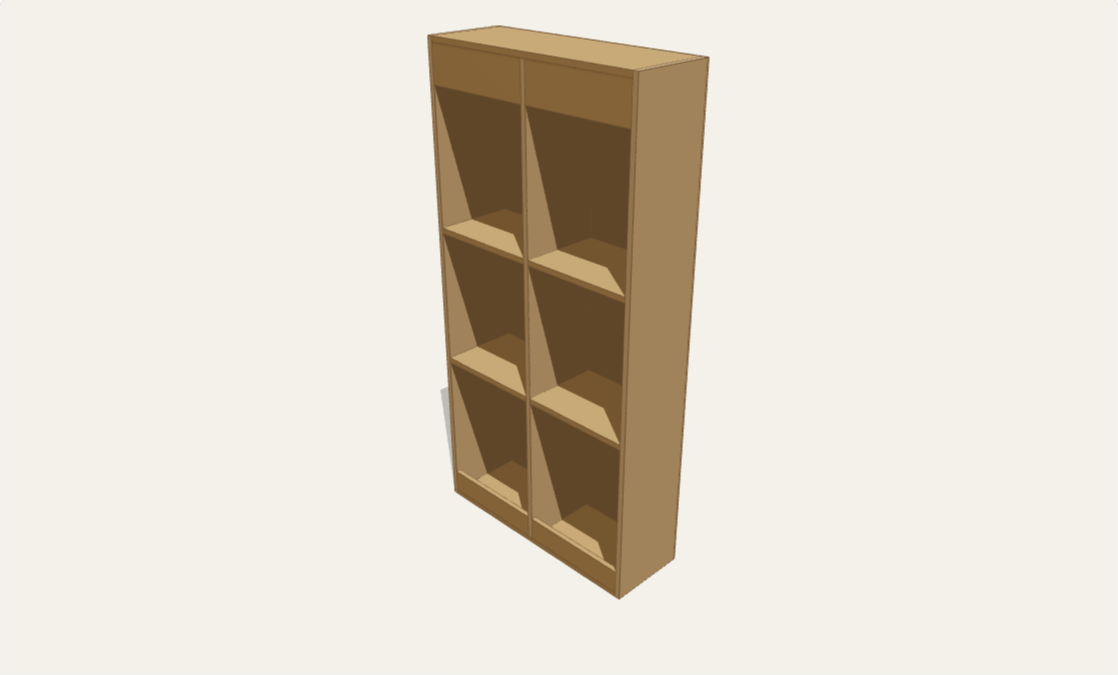
Frameless bookshelf
914.4 mm × 311.15 mm × 1828.8 mm · 2 bays · 2 shelves per bay
Cut list
| Part | Qty | L × W × T (mm) | Note |
|---|---|---|---|
| Side panel | 2 | 1828.8 × 304.8 × 19.05 | Step 1: cut matching sides; apply veneer edge banding to front edges before assembly. |
| Top / bottom panel | 2 | 876.3 × 304.8 × 19.05 | Step 2: fit between sides, flush with their ends. Use two 31.75 mm pocket screws per end with glue; edge-band fronts. |
| Divider | 1 | 1790.7 × 304.8 × 19.05 | Step 2: fit BETWEEN top and bottom panels. Set equal clear bay widths of 428.63 mm; two pocket screws per end with glue. Edge-band fronts. |
| Fixed shelf | 4 | 428.63 × 304.8 × 19.05 | Step 2: shelf undersides are 615.95 mm, 1143 mm above the floor. Clear openings at the front are 508 mm including allowance for the header/base rails. Two pocket screws per end with glue; edge-band fronts. |
| Top bay rail (1×6) | 2 | 428.63 × 139.7 × 19.05 | Step 2: fit vertically just below the top panel, flush with the front. Two pocket screws per end and two upward into the top. Optional crown moulding is cut to fit, not included here. These rails sit at the front, so do not anchor through them; see the back-panel note for anti-tip anchoring. |
| Bottom bay rail (1×4) | 2 | 428.63 × 88.9 × 19.05 | Step 2: fit vertically above the bottom panel, flush with the front. Two pocket screws per end and two downward into the bottom. Optional base moulding is cut to fit. |
| Back panel | 1 | 1828.8 × 914.4 × 6.35 | Step 3: square the carcass, then glue and nail the back to sides, dividers and fixed panels/shelves. If wider than your sheet, split on divider centerlines and share the joint. Back adds 6.35 mm to depth. Before loading, fasten anti-tip brackets to the solid 19.05 mm top panel or side panels near their rear edges and to suitable wall framing; the thin back is not an anchor. |
| Pocket screw 31.75 mm | 52 | 31.75 × 4 × 4 | Two per panel/shelf/divider end; each rail gets two per end plus two into its adjoining panel. Use jig settings and screw type for the actual material thickness. |
| Back brad 25.4 mm | 64 | 25.4 × 1.2 × 1.2 | Purchase allowance for approximately 150 mm spacing along the perimeter, dividers and fixed shelves; mark all nailing lines before laying on the back. |
About this plan
A frameless bookshelf in 3/4 in plywood: full-height sides, dividers fitted between continuous top and bottom panels, fixed shelves per bay, front 1x6 header and 1x4 base rails, and a 1/4 in back. Assemble the carcass and rails with pocket screws and glue, square it, then nail on the back. This independently modeled adaptation follows Ana White's Frameless Bookshelf construction. Crown and base moulding are optional and not modeled. Plan for intermediate woodworking skills and a weekend of cutting and assembly, plus finish curing time.
Choose a width of 600–1828.8 mm, height of 900–2438.4 mm, one to four bays, and zero to six fixed shelves per bay. Count limits adapt to keep clear bay widths between 254 and 914.4 mm and front openings at least 304.8 mm high, including shelf thickness and header/base rails. Depth is 304.8 mm plus the applied back. Outputs are a live cut list and shareable assembled/exploded 3D view, not a tested load rating. Before loading, secure the cabinet to suitable wall framing with anti-tip brackets fastened to the solid top panel or sides near the back edge; do not rely on the thin back panel.
Questions
- Which dimensions can I change?
- Width, height, bay count (1–4), and shelves per bay (0–6). Depth stays 305 mm (12 in), the reference's recommended depth. The engine makes all bay widths exactly equal and clamps shelf counts so clear spacing stays at or above 305 mm.
- How wide can each bay be?
- Clear bay width is limited to 254–914.4 mm (10–36 in). The bay count increases when a selected width would make shelves too wide, and decreases when bays would become too narrow. Shelf spacing controls clearance, not load capacity; assess material and expected loads separately.
- Why are shelves fixed instead of adjustable?
- The reference build pins fixed shelves with pocket screws and glue, which is what makes the carcass rigid. Adjustable pinning is possible, but this plan models the fixed-shelf version.
- Do I need edge banding?
- It is optional but recommended: iron 3/4 in veneer tape onto the exposed front edges of every panel and shelf before assembly, then trim and lightly round it. It hides plywood plies and reads as painted or stained solid wood.
- Does this plan include a CNC file?
- No. Every part is a straight panel cut in sheet plywood. You get the live cut list plus assembled and exploded 3D views; CNC download controls are intentionally absent.